

Introduction#
The GU 192 V3 is a GNSS synchronized clock movement for use in self-setting indoor and outdoor clocks for dial diameter up to 80 cm.
Two variants with different shaft lengths are available. For clocks without illumination, GU 192 V3 is used, for illuminated clocks the GU 192t V3 (t = long shaft).
Device Variants#
This instruction manual is for the GNSS clock movements GU 192 V3 and GU 192t V3. Below, both models will be referred to as GU 192 for better readability. With the exception of the shaft length, this term always refers to both models within the manual (GU 192 V3 and GU 192t V3). Additionally, both movements are sold as kit containing additional mounting material.
AN 144302: GU 192 V3
AN 144303: GU 192t V3
AN 144651: GU 192 V3 Kit
AN 144653: GU 192t V3 Kit
Deprecated Device Variants#
Mechanically, the GU 192 V3 devices are identical to the previous generations. Mounting of dials and hands did not change. Due to evolving GNSS technology, the receivers and antennas of previous generations are not compatible with the current V3 device variants. Its is not possible to cascade the new devices with old ones. This affects following devices:
AN 120719: GU 192 V2
AN 120720: GU 192t V2
AN 201415: GU 192 V1
AN 201418: GU 192t V1
Note
Cascading will be supported with a new QU 192 V3, this will be available shortly.
Scope of delivery#
Please check your delivery for completeness and notify your supplier within 14 days upon receipt of the shipment, if it is incomplete.
The package you received contains:
GU 192(t) V3
GNSS Magnet Antenna
Kits additionally include:
Hand-bushing for hour-hand
Hand-bushing for minute-hand
Getting Started#
Mount the movement into the clock onto the dial
Mount the minute and hour hands
Install the power supply
Configure the time zone
Position and connect the magnet antenna
Wait for reception and for the clock to run to time
Mounting#
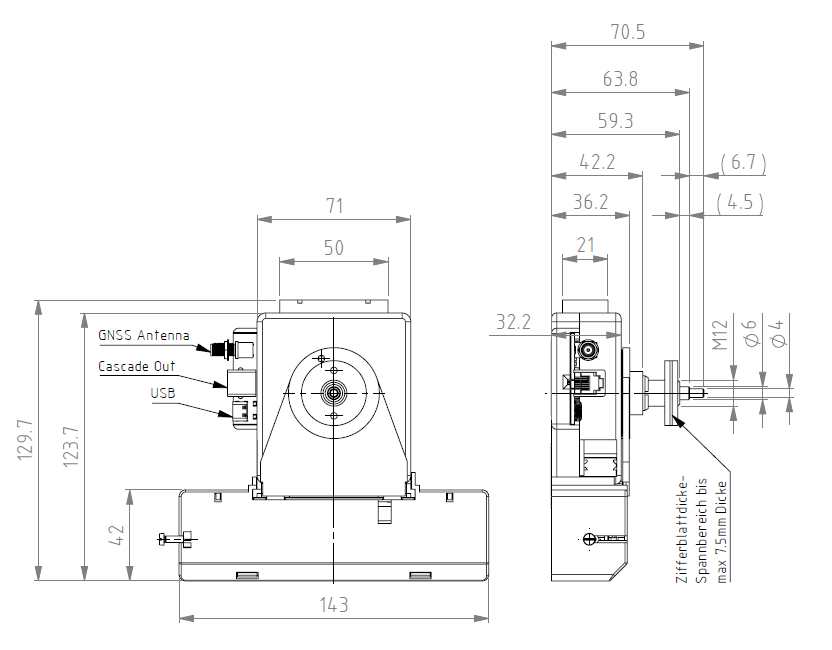
Mount the GU 192 V3 movement onto the clock dial using the central nuts on the movement axis.
Mount Hands#
The axles for the hour and minute hands are set to the reference position (12:00) at the factory. Carefully slide the hands onto the axles and tighten them. There must be sufficient space between the hands.
Caution
After assembly, always check the 12:00 position.
Power Supply#
Connect the power supply by inserting the 2x Alkaline D Size Batteries (LR20). The movement will start running to the 12 o clock reference position. It won’t move if it already is on 12h position.
Note
Lithium Batteries and Mains Power Supply will be available shortly.
Check Hand Position#
After powering up the movement searches 12h position. When it stops moving (it might not move at all in case it already is on 12h position) check the alignment of the hands. If the hands are misaligned, remove power supply, loosen the screws holding the hands and adjust the hand position carefully.
Note
We advise to check hand position before connecting the GNSS antenna. Without the antenna, the movement will stay at its 12h position,
Configuration#
By default, the time zone is set to Zurich. If the movement is operated in any central European zone, this step may be skipped.
Connect the movement to a computer using USB-C. Connect to the movement using the VCOM (Virtual COM Port). Any Serial Terminal software can be used, for example Putty or Chrome Serial Terminal. Please note that Chrome Serial Terminal requires a Chrome based browser, Firefox, Safari or similar won’t work.
Connect the movement using USB and open the corresponding COM Port. Settings like Baudrate may be skipped as VCOM over USB ignores them. The movement now provides a Command Line Interface (CLI) to change settings.
To change time zone enter clock set timeZone London, confirm the command by typing Enter.
Note
Timezones are set according to official IANA names. Enter the city name without its continental prefix, for example London instead of Europe/London. Also note the official IANA time zone spelling. IANA names use underscore (_) instead of whitespaces. The time zone for New York is New_York. Further IANA replaces any special character, Zürich is entered as Zurich.
Check the time zone table section of the user manual for a complete list of supported time zones.
Other settings may be changed as well (optional):
gnss set syncIntervall 12configures the movement to turn GNSS reception on every 12hgnss set syncTime 06:15configures the movement to start GNSS exactly at 06:15gnss set syncTimeout 240configures the movement to run to 12h and stop if it can not receive a GNSS signal for 240 hoursgnss set fixDuration 60configures the movement to leave GNSS on for 60 seconds after receiving proper signalgnss set fixTimeout 120configures the movement to turn GNSS of after 120 seconds if no signal is found
The movement can be controlled using various commands
clock set mode 12hCommand the movement to go to 12h position and stay thereclock set mode runCommand the movement to go to time (if the movement is synchronized)gnss sync nowCommand the movement to start GNSS reception now
Hint
You may type gnss help or clock help the get information about available commands.
Position and Connect GNSS Antenna#
Place the GNSS Antenna with the arrow pointing up. The antenna must have unobstructed view towards the sky with an unobstructed field of view of at least 90°. Use the magnetic mount or the adhesive pad to hold the antenna in place. Connect the antenna to the movement using the SMA connector. If the LED is not already blinking, press the button for 1s to start GNSS reception. The LED will blink once a second while looking for reception. As soon as time has been received, the movement will run to time.
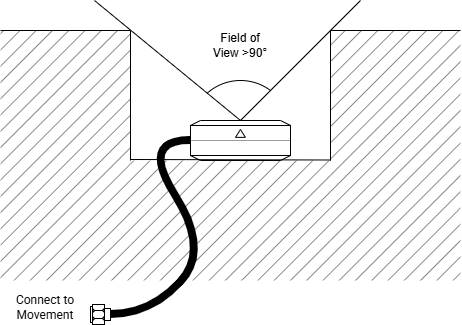
If the movement does not go to time after 10 minutes, check following issues:
Make sure the movement is not manually set to 12h. Send
clock set mode runover USBMake sure antenna is properly connected
Improve antenna placement, GNSS reception typically needs unobstructed view of the sky. Shading from buildings should be avoided as much as possible.
Note
Good antenna placement and therefore good GNSS reception increases battery lifetime, as less time and power is required to synchronize the movement.